Spring AI Series: #5 Model Context Protocol (MCP) [and Tool Calling 2]
Check out the previous post in this series: Docker Compose Set Up + Tool Calling 1
“MCP (Model Context Protocol) is an open-source standard for connecting AI applications to external systems.” (source: MCP)
The idea of MCP stadardizes how we can enhance LLMs answering capabilities by providing them with access real world, real time, custom data sources. In this installment, we’ll create some
basic REST endpoints to mimic a real world application, and then we’ll leverage the MCP server components provided by Spring AI to expose some MCP tools out of our existing application.
Once we’ve done that, we’ll go back to our existing ChatClient application and configure it so that it can leverage these tools.
A Basic Blog
First, we’ll create a basic Spring Boot application.
A simple controller with a few endpoints…
@RestController
@RequestMapping("/v1")
public class BlogController {

    final BlogService blogService;

    public BlogController(BlogService blogService) {
        this.blogService = blogService;
    }

    @GetMapping("/post")
    public Iterable<Post> getPosts() {
        return blogService.findAll();
    }

    @GetMapping("/post/{id}")
    public Post getPostById(@PathVariable Long id) {
        return blogService.findById(id);
    }

    @PostMapping("/post")
    public Post createPost(@RequestBody Post post) {
        return blogService.save(post);
    }

    @PostMapping("/writer")
    public Writer createWriter(@RequestBody Writer writer) {
        return blogService.save(writer);
    }
}
a service…
@Service
public class BlogService {

    final PostRepository postRepository;
    final WriterRepository writerRepository;

    public BlogService(PostRepository postRepository, WriterRepository writerRepository) {
        this.postRepository = postRepository;
        this.writerRepository = writerRepository;
    }

    public Post save(Post post) {
        return postRepository.save(post);
    }

    public Writer save(Writer writer) {
        return writerRepository.save(writer);
    }

    public Iterable<Post> findAll() {
        return postRepository.findAll();
    }

    public Post findById(@McpToolParam Long id) {
        return postRepository.findById(id).orElse(null);
    }

    public Iterable<Post> findAllByWriter(@McpToolParam String authorName) {
        return postRepository.findAllByWriter_Name(authorName);
    }
}
and just two entities with their respective repositories -
@Entity
public class Post implements Serializable {

    @Serial
    private static final long serialVersionUID = 8739892075746926464L;

    @Id
    @GeneratedValue(strategy = GenerationType.AUTO)
    private long id;

    @Size(max = 512)
    private String post;

    @NotNull
    @ManyToOne(fetch = FetchType.EAGER, cascade = CascadeType.DETACH)
    private Writer writer;

    ...
}

@Entity
public class Writer implements Serializable {

    @Serial
    private static final long serialVersionUID = 5781215924925423486L;

    @Id
    @GeneratedValue(strategy = GenerationType.AUTO)
    private Long id;

    @NotNull
    @Size(max = 100)
    private String name;

    ...
}

public interface PostRepository extends CrudRepository<Post, Long> {
    Iterable<Post> findAllByWriter_Name(String userName);
}

public interface WriterRepository extends CrudRepository<Writer, Long> {
}
That’s it. I have also set up another postgres database for this application, but you could go with an in memory H2 db.
This is how the dependencies and application properties look like.
dependencies {
    implementation 'org.springframework.boot:spring-boot-starter-data-jpa'
    implementation 'org.springframework.boot:spring-boot-starter-web'
    runtimeOnly 'org.postgresql:postgresql'
}
spring.application.name=TestBlogMcp
server.port=8081

spring.datasource.url=jdbc:postgresql://localhost:5432/blog
spring.datasource.username=postgresu
spring.datasource.password=postgresp
spring.jpa.hibernate.ddl-auto=create
Exposing @McpTools and turning our application into an MCP server
We’ll just have to add another dependency to our project.
implementation 'org.springframework.ai:spring-ai-starter-mcp-server-webmvc'
And, we will also define the mode of our MCP server, which in this case would be streamable.
spring.ai.mcp.server.protocol=streamable
Now, let’s expose some @McpTools out of our exisiting service methods.
    @McpTool(
            name = "post-find-all",
            description = "I return all blog posts created by all users.")
    public Iterable<Post> findAll() {
        return postRepository.findAll();
    }

    @McpTool(
            name = "post-find-by-post-id",
            description = "I return a specific blog post if an Id is provided.")
    public Post findById(@McpToolParam Long id) {
        return postRepository.findById(id).orElse(null);
    }

    @McpTool(
            name = "post-find-by-writer-name",
            description = "I return all blog posts created by all writers with the given name.")
    public Iterable<Post> findAllByWriter(@McpToolParam String authorName) {
        return postRepository.findAllByWriter_Name(authorName);
    }
That’s it, just added the @McpTool annotations, nothing else.
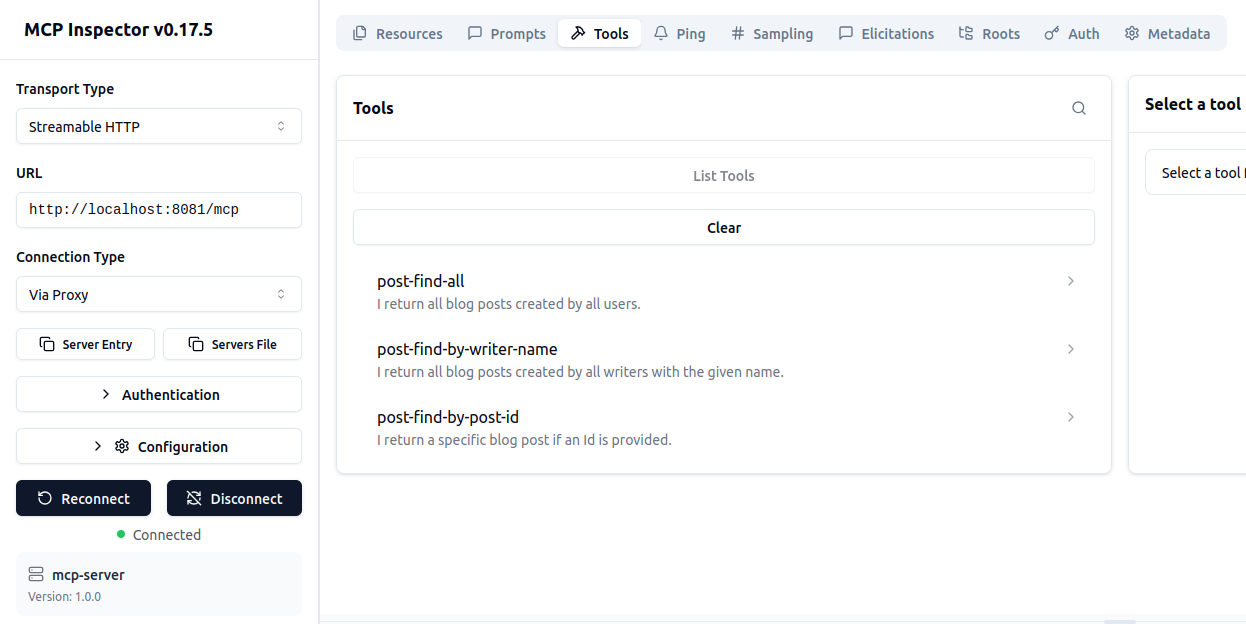
There’s an amazing tool called MCP inspector that can help us to see if our MCP tools are set up the way we wanted. You can run it easily using their docker image.
docker run --rm --network host -p 6274:6274 -p 6277:6277 ghcr.io/modelcontextprotocol/inspector:latest
With this inspector, you can see the tools that you have exposed!
Setting up MCP Client
To be able to use the tools exposed from our MCP server, we’ll set up an MCP client into our ChatClient, the project that we’ve been working with so far. We’ll just add the MCP
client dependency -
implementation 'org.springframework.ai:spring-ai-starter-mcp-client'
and, we’ll add the MCP server endpoint in the application properties -
spring.ai.mcp.client.streamable-http.connections.blog.url=http://localhost:8081/mcp
You can add as many such MCP servers as you like. Once you’ve done that, we can now modify the bean configuration with ToolCallbackProvider for our ChatClient to be able to use
these newly built tools.
@Bean
    public ChatClient ollamaChatClient(OllamaChatModel chatModel, VectorStore vectorStore, ToolCallbackProvider toolCallbackProvider) {
        ChatMemory chatMemory = MessageWindowChatMemory
                .builder()
                .chatMemoryRepository(chatMemoryRepository)
                .maxMessages(100)
                .build();

        return ChatClient
                .builder(chatModel)
                .defaultToolCallbacks(toolCallbackProvider)
                .defaultAdvisors(
                        MessageChatMemoryAdvisor.builder(chatMemory).build(),
                        QuestionAnswerAdvisor.builder(vectorStore).build()
                ).build();
    }
Now, if I create a blog post on the Blog application side -
###
POST http://localhost:8081/v1/writer
Content-Type: application/json

{
  "name": "Pranjal Chakraborty"
}

###
POST http://localhost:8081/v1/post
Content-Type: application/json

{
  "post": "This is the second greatest post ever",
  "writer": {
    "id": 2
  }
}
And ask our Ollama chat client to retrieve all the blog posts, this is what we see -
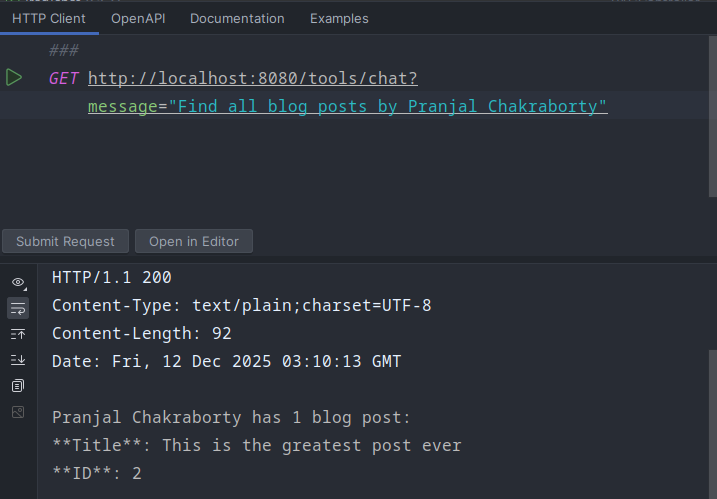
How cool is that! In practice, proper tool setup with appropriate prompts can eliminate hallucinations drastically.
You might be wondering how we keep track of all of this - our prompts, the responses generated by our chat client, and so on. One of the biggest pitfalls
of agentic systems is that, no matter how hard you try, they are not deterministic. Observability is crucial even in deterministic systems, so you can imagine
how critical a role it plays in this new paradigm of software design. We’ll explore observability tools that can alleviate some of these concerns.